New Zealand Visa Photo Requirements: Everything You Must Know Before Applying
Table of Contents
Applying for a visa can feel stressful — and one small mistake with your photo can slow things down. This guide explains New Zealand Visa Photo Requirements in plain, human words so you can feel calm and ready before you hit submit. I’ll also explain how to Submit NZeTA Online and how to check your NZeTA Visa Status later in the article.
Why your photo matters
The photo is one of the first things immigration checks. A clear, correct photo helps officers match your face to your documents quickly. If your picture does not meet the New Zealand Visa Photo Requirements, your application may be delayed or you may be asked to send a new photo — that costs time and nerves. So it’s worth getting the photo right the first time.
The short, must-follow rules
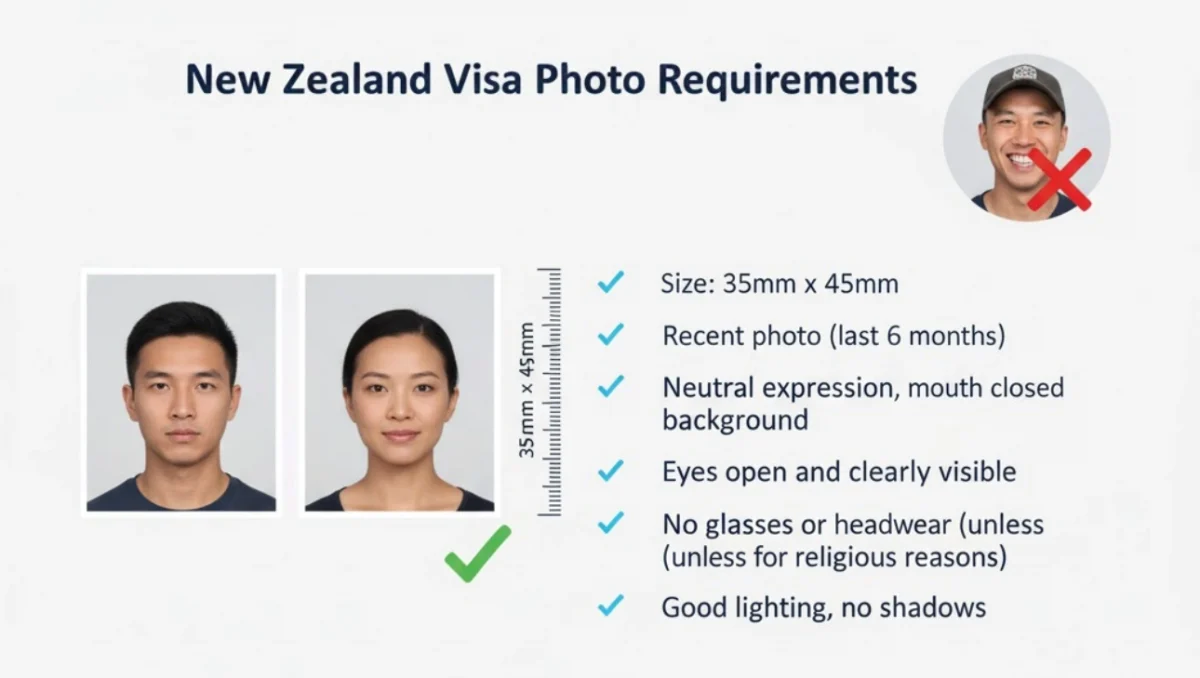
Here are the core rules you must follow for New Zealand Visa Photo Requirements:
- The photo must be recent — taken within the last six months.
- It must show a full front view of your face and shoulders, looking straight at the camera with eyes open.
- Keep a neutral expression (no big smiles).
- The background must be plain and light-coloured, with no heavy shadows.
- No face coverings that hide your face. Religious headwear is allowed only if the full face is visible.
- Digital photos must be JPG or JPEG when uploading.
These are the headline items. Later sections explain sizes, technical details, and common errors so you can be sure your photo will be accepted.
Size and technical details — printed and digital
If you are sending printed photos (paper application), studios normally print the passport/visa size 35 mm × 45 mm. For online applications, Immigration New Zealand accepts digital JPG/JPEG photos and asks that the image clearly shows your face and shoulders. The system may also give on-screen guidance while you upload. For NZeTA applicants, there are often minimum pixel and file-size limits (for example, some guidance lists 540 × 720 pixels and limits on file size). Always check the exact upload rules when you Submit NZeTA Online.
How to take an acceptable photo — simple steps
You don’t need a professional camera. A modern smartphone works fine if you follow these tips:
- Stand about 1–2 metres from a plain wall so there are no shadows behind you.
- Use soft, even lighting (natural daylight from the front is best). Avoid strong backlight.
- Wear normal clothes (no uniforms or busy patterns).
- Remove glasses with tinted lenses, sunglasses, and large jewelry that hides your face. If you wear a headscarf for religion, make sure your face is fully visible.
- Look straight at the camera with a neutral expression; keep your mouth closed.
After taking the photo, save it as a high-quality JPG. If you’re applying online, make sure the file meets the portal’s size limits before uploading.
Common mistakes and how to avoid them
People often trip up on simple things. Here are common errors and quick fixes:
- Photo older than six months — take a new one.
- Shadows on the face or busy background — move away from the wall and use softer light.
- Face too small or cropped wrong — include head and shoulders; the face should take most of the frame.
- Wrong file type — only JPG/JPEG is accepted for uploads.
Fix these before you upload and you’ll avoid a rejection email saying “photo not accepted.”
NZeTA applicants — a few extra tips
If you plan to apply with an NZeTA, you will Submit NZeTA Online through the official NZeTA portal. The portal will ask for a recent JPG/JPEG photo and often gives immediate feedback if the picture fails technical checks. After applying, save your confirmation and use it to check your NZeTA Visa Status on the same site or via the official NZeTA check tool. If the portal rejects your image, it will usually tell you why so you can fix the specific issue.
What happens if your photo is rejected?
If Immigration New Zealand or the NZeTA system decides your photo doesn’t meet the rules, you’ll be asked for a new one. That means delay. What to do next:
- Read the rejection reason carefully (file type, size, background, age).
- Retake the photo following the rules above.
- Save the corrected image as a JPG and re-upload it when asked.
Keeping the original file makes editing or re-cropping quick, but don’t over-edit — filters or heavy retouching can cause rejection.
Quick checklist before you upload
- Photo taken within last 6 months.
- Full front view, shoulders visible, neutral face.
- Plain light background, no shadows.
- File is JPG/JPEG and meets size limits for the portal.
- If using NZeTA, did you Submit NZeTA Online and save the confirmation so you can check NZeTA Visa Status later?
Final words
Getting the photo right is one of the easiest ways to speed up your visa application. Following these New Zealand Visa Photo Requirements will help your application move through without unnecessary delays. If you want extra peace of mind, a professional photo studio or a trusted online visa-photo service can create a compliant JPG for you.